Filezilla does not work on a Win2k machine due to the auto update feature. We need to turn this off to get it working.
Navigate to %APPDATA%\FileZilla, open filezilla.xml.
Search for code <Setting name="Update Check" type="number">1</Setting>
Change to code: 0
All should be well.
Dec 15, 2009
Dec 7, 2009
Sonicwall Registration Server Timeout
*Update: 12/9/09 - 3 days later, I was able to register the sonicwall*
I've been trying to register a new Sonicwall firewall installation, and their registration server has been down for over a day now, and this isn't the first time this has happened to me either. I was at a client's site with a new installation, and Sonicwalll's registration server took a nice long vacation. It was embarrassing to set up everything and then end up having to wait another day for their registration to come back to work! Tech support is futile, and outsourced, so they can't do anything to solve the problem.
Their hardware works well for me, but common Sonicwall, keep your site up! Thanks.
Dec 4, 2009


Google Public DNS: Day 1
 After setting up my router for Google Public DNS, I can say my Internet experience feels faster. Yeah, faster like a supercharged hamster on steroids running a 100 meter dash. Google DNS is "blazing fast" for me, and page loads are virtually instantaneous on my screen.
So for those who haven't tried this yet, I'll walk you through my experience with Google DNS to give you an idea of how it is to use their service:
I'll type www.ebay.com in Google Chrome. Press Enter. I blink. The page is loaded.
That pretty much sums it up...but seriously =), if you live relatively near a Google Data Center, your web experience may get a boost by using their DNS servers. Try it out, see if you like it, and if not, just switch back to your ISP's DNS servers, or hey, try out Open DNS.
P.S. Thank you Google for Gmail, Chrome, Blogger, Google payments, Video, Free phone calls using Google Voice, Calender, DNS, and last but not least, thank you in advance for the VOIP cell phone service coming in the future ; ).
Dec 3, 2009
Boxee Keyboard Shortcuts
Courtesy of DARKFiB3R on the boxee forums:
In Menus
\ = Full Screen (Enter, Exit)
S = Exit, Suspend
A = Library Status
H = Home
Home = Top of list
End = Bottom of list
Esc = Back
Enter = Enter
Arrows = Up, Down, Left, Right
In Playback
I = Toggle info
Y = Toggle info on CPU load and FPS
O = Toggle info
R = Rewind: 2X > 4X > 8X > Play (Space = Play)
P = Pause
[ = Skip back 10 mins
] = Skip Forward 10 mins
< = Previous track > = Next track
A = Library Status
S = Exit, Suspend
V = Toggle Home & Now Playing
F = Foward: 2X > 4X > 8X > 16X > 32X > Play (Space = Play)
X = Stop now playing
Space = Play, Pause
How to: Set up Google Public DNS
Possibly faster internet searches and better security, try taking a ride with Google Public DNS.
From google:
Need help on the phone?
Google's Tech Support
877-590-4367 U.S.
770-200-1201 outside the U.S.
My internet searches feel faster already.
Thank you Google, and enjoy!
Nov 30, 2009
Tutorial: Nvidia ION N330 + XBMC + VDPAU + 1080P w/sound over HDMI
Alright guys and gals, I got around to updating my HTPC box over Thanksgiving weekend, and I can now say that the beta XBMC build looks mighty sexy when displayed in 1080P resolution. Also, DD, DTS passthrough, and Nav sounds are working 100% as well, including system sounds and Youtube in Firefox.
From reading the comments, in my previous post, it looks like the boxee instructions may not have worked 100% for some of you, my apologies, so I went ahead and did a fresh install to create new XBMC specific instructions for the following system:
Zotac Nvidia ION, Atom N330 Dual Core
2GB DDR RAM
Western Digital 150 GB Velociraptor
This will get you the 185 NVIDIA graphics drivers:
From what I read online, it looks like the newer 190 drivers may break HDMI sound? I'm using 185, and sound/graphics work beautifully.
Update Dec. 2nd, 2009: I'm now using 190.42 drivers without problems. Tested sound and video. Haven't tested passthrough on the 190.42 yet.
From what I read online, it looks like the newer 190 drivers may break HDMI sound? I'm using 185, and sound/graphics work beautifully.
Update Dec. 2nd, 2009: I'm now using 190.42 drivers without problems. Tested sound and video. Haven't tested passthrough on the 190.42 yet.
Update Dec. 3rd, 2009: Passthrough is working great. Suspend problems though with the 190.42 drivers. Ubuntu goes into suspend okay but no graphics or response upon resume.
Add these repositories to your sources:
deb http://ppa.launchpad.net/nvidia-vdpau/ppa/ubuntu karmic main
deb-src http://ppa.launchpad.net/nvidia-vdpau/ppa/ubuntu karmic main
Open up a terminal:
sudo apt-key adv --recv-keys --keyserver keyserver.ubuntu.com 71609D4D2F1518FA9C5DC0FB1DABDBB4CEC06767

sudo apt-get update

sudo apt-get install linux-headers-generic nvidia-glx-185

sudo reboot
Upon Rebooting go into the BIOS.
(the following instruction is from my memory, so if you dont' find it there, it's somewhere in your BIOS) In your BIOS, go to Southbridge configuration and change the video RAM from 256MB to 512MB. Inside the Southbridge config, change Audio codec to Internal only.
Open up another terminal (this will enable Youtube, and XBMC system sounds):
Type in: alsamixer
Make sure that IEC958 is unmuted by pressing the letter "m" without quotes.
If it it muted, then it will look like this - Item: IEC958 [off]
Once you unmute it, then it will look like this - Item: IEC958
Thanks to Greenhughes.com for the alsamixer tip.
This will get you sound/passthrough over HDMI:
(haven't tested coax or optical)
Boot into Ubuntu, and open up a terminal and type:
sudo gedit /etc/asoundrc.conf
Paste the following into that file:
pcm.dmixer {

type dmix

ipc_key 1024

ipc_key_add_uid false

ipc_perm 0660

slave {

pcm "hw:0,3"

rate 48000

channels 2

period_time 0

period_size 1024

buffer_time 0

buffer_size 4096

}

}


pcm.!default {

type plug

slave.pcm "dmixer"

}
Open up another terminal (this will enable Youtube, and XBMC system sounds):
Type in: alsamixer
Make sure that IEC958 is unmuted by pressing the letter "m" without quotes.
If it it muted, then it will look like this - Item: IEC958 [off]
Once you unmute it, then it will look like this - Item: IEC958
Thanks to Greenhughes.com for the alsamixer tip.
Save. Close it. Reboot.
Inside XBMC:
Go to Settings, Audio and change the following:
Instead of:
sound: Internal Codec HDMI
passthrough: ie958
Change to custom (type hdmi):
sound: hdmi
passthrough: hdmi
sound: hdmi
passthrough: hdmi
Now you will have HD video and sound in Ubuntu and XBMC from your HD videos all the way to SD youtube, hulu, or whatever you want to play. Now go have fun!
Oct 16, 2009
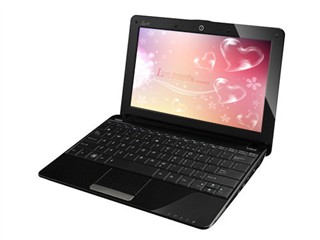
Intel GMA = The Suck, so I'm buying a Nvidia ION equipped Asus Eee PC 1201N
 Ever try playing HD content on your laptop with an Intel GMA branded GPU? Annoyingly choppy, isn't it? Shh, say no more, say hello to the Nvidia ION GPU.
Two new Asus Eee PC netbook specs were leaked on eeepc.it, and then were quickly taken down, and it looks like one of them will be flexing some muscle with raw GPU power.
The Asus Eee PC 1201N and the Asus Eee PC 1201HA are slated for release, probably in the upcoming quarter, and I want one now. Alright, so what's the big deal between these two models? The 1201N comes with a Dual Core Intel N330 Atom and Nvidia ION and the 1201HA does not, so if you want to play those movies, HD content, HD Flash 10.1, and Physx powered games in your collection, get the 1201N.
I can see why Asus released a cheaper model with a slower Intel Atom 1.33 Ghz CPU and Intel GMA 500 chip, but cmon, a user would be sacrificing HD movies, games, and performance. I, for one, will be looking forward to the release of the 1201N.
| Asus Eee PC 1201N | Asus Eee PC 1201HA |
| 12.1 " Display | 12.1 " Display |
| Intel Dual 1.6Ghz N330 Atom | Intel Single 1.33Ghz Z520 Atom |
| Nvidia ION 9400M | Intel GMA 500 |
| 3GB DDR2 RAM | 2GB DDR2 RAM |
| 320GB HD | 250GB HD |
| 802.11b/g/n | 802.11b/g/n |
| Bluetooth | Bluetooth |
| 6-cell | 6-cell |
| Webcam | Webcam |
| Windows 7 Home Premium | Windows 7 Home Premium |
Oct 15, 2009
1and1 Webmail Down: 500 Internal Server Error

If enough of their users call them to complain, then maybe they'll do something about it. Give them a piece of your mind 1and1 clients.
Aug 18, 2009
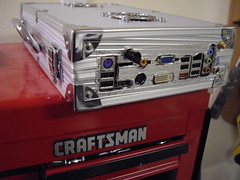
Tutorial: Zotac ION N330 + Boxee/XBMC + VDPAU + 1080P w/sound over HDMI
*Update 12/01/09 - Instructions For BOXEE ONLY. Please refer to this post for XBMC.*
This post will get you video and audio over HDMI including audio passthrough for Dolby Digital or DTS. Feel free to skip down to the good stuff ; ).
I ordered my board on Amazon w/free shipping for $190 including a 19V power supply--I assumed it would be a 12V power supply. After completing the installation, when playing 720P movies, my CPU usage was less than 6% per core! From what I've read, 1080P does NOT utilize the CPU core all that much either.
FYI: For those worried about getting an older board: the older revision of this board had a USB suspend problem, but now all the boards being sold have been fixed with an added jumper.
Here are my system specs:
Zotac N330
1GB DDR RAM
4GB OCZ Rally2 USB stick w/Ubuntu 8.10 Intrepid installed
Boxee w/latest build
These instructions are interchangeable with XBMC. Boxee is built on XBMC, so some of the references will look similar.
This will get you the latest NVIDIA graphics drivers:
Add these repositories to your sources:
deb http://ppa.launchpad.net/nvidia-vdpau/ppa/ubuntu intrepid main
deb-src http://ppa.launchpad.net/nvidia-vdpau/ppa/ubuntu intrepid main
Open up a terminal:
sudo apt-key adv --recv-keys --keyserver keyserver.ubuntu.com 71609D4D2F1518FA9C5DC0FB1DABDBB4CEC06767sudo apt-get updatesudo apt-get install linux-headers-generic nvidia-glx-185sudo rebootUpon Rebooting go into the BIOS.
(the following instruction is from my memory, so if you dont' find it there, it's somewhere in your BIOS) In your BIOS, go to Southbridge configuration and change the video RAM from 256MB to 512MB. Inside the Southbridge config, change Audio codec to Internal only.
Go into boxee, Settings, Video:
Turn on accelerate videos when posssible to enable VDPAU.
Exit boxee.
This will get you sound over HDMI:
(not sure about coax or optical)
Boot into Ubuntu, and open up a terminal and type:
sudo gedit ~/.asoundrcPaste the following into that file:
pcm.dmixer {type dmixipc_key 1024ipc_key_add_uid falseipc_perm 0660slave {pcm "hw:0,3"rate 48000channels 2period_time 0period_size 1024buffer_time 0buffer_size 4096}}
pcm.!default {type plugslave.pcm "dmixer"}
Open up another terminal (this will enable Youtube, and XBMC system sounds):
Type in: alsamixer
Make sure that IEC958 is unmuted by pressing the letter "m" without quotes.
If it it muted, then it will look like this - Item: IEC958 [off]
Once you unmute it, then it will look like this - Item: IEC958
Save. Close it. Reboot.
Inside Boxee:
Go to Settings, System, Audio and change the following:
Instead of:
sound: ie958
passthrough: ie958
Change to (type default to where ie958 is):
sound: default
passthrough: default
sound: default
passthrough: default
Now you will have HD video and sound in Ubuntu to Boxee from your HD videos all the way to youtube, hulu, or whatever you want to play. Now go have fun!
Jul 22, 2009
Ruger Mark III Guide - Field stripping, Upgading, Cleaning, and Tips
Before attempting any work on your firearm, please make sure your firearm is unloaded and safe to work on. The following information has been compiled to help Mark III owners find information in one place.
All content was made by their respective owners. Props goes out to these guys.
Tutorials in this thread:
I. Field Strip
II. Volquartsen Accurizing Kit Installation
III. FTE/Stovepipe Problem/Solutions
IV. Volquartsen Extractor Installation
V. Personal Experiences
VI. Magazine Safety Removal Mod (updated)
VII. Cleaning
VIII. Ultimate Cliploader
IX. Places to purchase parts
I. Fieldstrip Videos:
Field stripping the Mark III by OrbitalMechanics
1. Stripdown:
http://www.youtube.com/watch?v=0Id7xcRoIvE
2. Reassemble:
http://www.youtube.com/watch?v=O4nVX2FlBHY
Before firing the first round:
I would recommend a field strip and a good cleaning of your new Ruger before first use. During my first cleaning, there were tiny metal jibs, from production, in places where they should not have been. Plus, field stripping, cleaning, and oiling is fun with the right tools and knowledge.
II. Volquartsen Accurizing Kit Installation:
http://videos.volquartsen.com/MKIII%...stallation.mov
Instructions and Pictures to Detail Strip Mark III (Use this guide to install VQ parts and accurizing kit)
http://www.guntalk-online.com/detailstrip.htm
III. FTE/Stovepipe Problem/Solutions
If your gun is having problems, then here's all you need to know:
http://www.rugerforum.com/phpBB/viewtopic.php?t=58358
IV. Volquartsen Extractor Installation:
http://www.guntalk-online.com/detailstrip.htm#extractor
V. Personal experience from installing parts:
The accurizing kit feels smooth as slicing through butter once installed. 2.25 pound trigger pull. If I were to do the install of the Accurizing Kit again, I would have purchased the Accurizing Kit and Titanium Disconnector and installed them all in one detail strip. I will be purchasing the Disconnector soon, so I will have to do another detail strip of the trigger components.
The overall kit installation was not that bad. The internal parts removal was okay, but the trigger removal and parts installation were a challenge. There are a few steps I got snagged on. I'll try and clarify to make it easier for you.
If you refer to the guntalk pictures: http://www.guntalk-online.com/detailstrip.htm
Internal frame Removal Step #5 - Safety lever - Yes, use caution when removing, or you may lose the tiny ball and/or spring.
Internal frame Installation Step #5 - Sear/Safety lever - The sear MUST be pushed up into the groove on the safety lever. While putting pressure on the sear in the up position, place the sear into the groove on the safety lever.
Trigger removal Step #1 - If you watched VQ video on this one, don't use a hammer! The trigger pivot pin is held by a thick wire/spring, which holds it in place. This is that one wire that goes alongside the frame. You'll need to apply pressure by pushing this spring down with either an allen wrench or the end of a plastic pen (be careful while applying pressure to not scratch the frame). The pressure will allow just enough space so that the pin can freely move. So while applying pressure, you can now pull the pin out.
The VQ edge extractor can be installed any time with your standard field strip, and is relatively easy to install.
VI. Magazine safety removal (bottom of the page):
http://www.guntalk-online.com/forum/viewtopic.php?t=387
After reading the post by ruger22, all you need to do this mod are 2 stainless metric M5 washers, and 1 SAE #10. The washers may be a tight fit, so dremel the center out, polish, and you're all done. No cutting needed. ruger22's method is very efficient.
VII. Cleaning your .22:
From the late and great Donald C. Nygord:
http://www.nygord-precision.com/cleaning.html
I use Hoppes.
VIII. The Ultimate Cliploader:
This tool will load your magazine in under 5 seconds flat:
Video by JaonsShooter: http://www.youtube.com/watch?v=65jHazxWXCA
IX. Places to purchase parts for your Mark III:
http://www.midwayusa.com
https://www.volquartsen.com/category...es/4-mkiimkiii
VQ Black Accurizing Kit:
http://www.midwayusa.com/viewproduct...tnumber=261502
https://www.volquartsen.com/products...er-mkiii-black
(The difference between the black vs. silver is that the black kit has a black extended bolt release vs. the silver kit has a silver extended bolt release.)
VQ Silver/Stainless Accurizing Kit:
http://www.midwayusa.com/viewproduct...tnumber=319266
https://www.volquartsen.com/products...or-ruger-mkiii
FTE/Stovepipes problems? (VQ Exact Edge Extractor):
http://www.midwayusa.com/viewproduct...tnumber=363360
VQ Titanium Disconnector:
https://www.volquartsen.com/products...m-disconnector
Ultimate Cliploader:
http://www.ebay.com
http://www.cheaperthandirt.com/GNS127-1.html
Be safe, and enjoy your Ruger!
Jun 25, 2009
How to: Add persistent route in Windows 2000 Professional
Go to command prompt
This will permanently route IP address 192.168.0.248 to gateway 192.168.100.1
route -p add 192.168.0.248 192.168.100.1
Jun 22, 2009
How to Fix: Google Chrome "Resolving Host" Problem
Google Chrome loads fast, is an excellent browser, but every now and then, I get a "Resolving Host" problem where my Internet access stops working. The browser just sits there and nothing happens.
Fix:
- Go into the top right of Chrome and click the Wrench Icon
- Go to Options
- Click on the Under the hood tab
- Check OFF "Use DNS pre-fetching to improve page load performance"
- Restart Chrome or Windows
May 20, 2009
Shorewall Firewall Configuration for a Single Host
Log into webmin, go into manual configuration (for each category listed below), and copy and paste these settings.
#Network Zones
#ZONE TYPE OPTIONS IN OUT
# OPTIONS OPTIONS
fw firewall
net ipv4
#Network Interfaces
#ZONE INTERFACE BROADCAST OPTIONS
net eth0 detect
#Default Policies
#SOURCE ZONE DESTINATION ZONE POLICY LOG LEVEL LIMIT:BURST
$FW net ACCEPT
net all DROP info
all all REJECT info
#Firewall Rules
#ACTION SOURCE DESTINATION PROTOCOL SOURCE PORTS
#DESTINATION PORTS
#The following line will enable FTP port 21 to work with PASV connections #connecting to port 30000 through 30100
ACCEPT:ULOG net fw tcp 21,30000:30100
#The following line will enable a VMware server machine to connect to our
#Vmware image via port 20000
ACCEPT:ULOG net:IPofVMwareHostgoeshere fw tcp 20000
#Blacklist Hosts
#Add IP addresses in this format
XXX.XXX.XXX.XXX/XX
Lastly, restart shorewall
If you'd like to block an entire country's IP addresses, the best place to go is www.blockacountry.com This site will list a country's IP address block assignments. They made it super easy for us to block an entire country! Throw some support, aka donations, if you do decide to use it.
.
May 18, 2009
How to: Vsftpd Virtual Users PAM Authentication Guide
This How to, will help you get your Vsftpd server up and running with Virtual Users (no local users), PAM authentication, and encrypted passwords.
For a more in depth explanation, and why we did what we did, here are the guides used as reference:
http://ubuntuforums.org/showthread.php?t=518293Overview of what we're about to create:
- Create user account, create directory for user account, and assign permissions to the user account
- Create a directory for Virtual User accounts' VSFTPD permissions. Each user account's permissions can be customized in this folder (we will do this later on in step 7)
- Backup Vsftpd.conf and edit Vstfpd.conf to enable local users, PAM service, enable guest, and define where our Virtual User account permissions are located
- Edit pam.d vsftpd file
- Create login text file
- Create login database for PAM to read and encrypt it
- Create a template settings file for Virtual User account permissions in step 2
- Use the template to create our user's permissions
- Edit our user's permission to define home and guest username
- Restart Vsftpd
- Put on our sunglasses and relax under the sun
The Guide:
1. The following will create a user with the name "genesis" and a home directory named "genesis"
# Must use -d option
sudo useradd -d /home/genesis genesis
sudo mkdir /home/genesis
sudo chown genesis /home/genesis
2. Create a directory for Virtual User accounts' VSFTPD permissions. You may already have the folder /etc/vsftpd
sudo mkdir /etc/vsftpd
sudo mkdir /etc/vsftpd/vusers
3. Backup Vsftpd.conf now. Edit your Vstfpd.conf and ensure these comments are either added or changed in addition to whatever you have in your current Vsftpd.conf. (you can use this sample vsftpd.conf as a guide) Virtual users are treated as guests, so we will enable guest access. We are also defining where our Virtual User account permissions are located.
sudo nano /etc/vsftpd.confanonymous_enable=NO
local_enable=YES
pam_service_name=vsftpd
guest_enable=YES
user_config_dir=/etc/vsftpd/vusers
4. Edit pam.d vsftpd file
sudo nano /etc/pam.d/vsftpd
Edit and ensure your /etc/pam.d/vsftpd file matches this one
# Standard behaviour for ftpd(8).
auth required pam_listfile.so item=user sense=deny file=/etc/ftpusers onerr=succeed
# Note: vsftpd handles anonymous logins on its own. Do not enable
# pam_ftp.so.
# Standard blurb.
#@include common-account
@include common-session
#@include common-auth
#auth required pam_shells.so
# Added per the readme to enable virtual users.
auth required /lib/security/pam_userdb.so db=/etc/vsftpd_login
account required /lib/security/pam_userdb.so db=/etc/vsftpd_login
5. Create a login.txt file wherever you want
sudo nano login.txt
We will specify users and passwords here. You can add as many users/passwords as you want here in the following format:
genesis
genesispasswordgoeshere
someotheruser
someotheruserpasswordgoeshere
6. You must have libdb3 and libdb3-util installed. db4, which you may already have, will not work. Personally, I use Webmin, and I had to install these directly from the packages.ubuntu.com site.
We will create the login database with our login.txt file and restrict access restrictions to the database. Future users will be added through this process, so to add more users, you either will recreate login.txt or edit it:
sudo db3_load -T -t hash -f login.txt /etc/vsftpd/vsftpd_login.db
sudo chmod 600 /etc/vsftpd/vsftpd_login.db
#The following is not a safe solution
#because if the file is compromised, all
#of your user/passwords will be compromised,
#but on the other hand, it will be easier
#to update future users you wish to add to
#your server. You should delete this with
#"sudo rm login.txt" without quotes
sudo chmod 600 /etc/vsftpd/login.txt
7. We will create a template for our user permissions located in /etc/vsftpd/vusers
sudo nano /etc/vsftpd/vusers/template1forusers
write_enable=YES
anon_mkdir_write_enable=YES
anon_other_write_enable=YES
anon_upload_enable=YES
local_root=/home/???
chroot_local_user=YES
dirlist_enable=YES
download_enable=YES
guest_username=???
8. Write out to template1forusers
9. Now open template1forusers once again and change the ??? marks in step 7 to define user "genesis"
sudo nano /etc/vsftpd/vusers/template1forusers
Edit:
write_enable=YES
anon_mkdir_write_enable=YES
anon_other_write_enable=YES
anon_upload_enable=YES
local_root=/home/genesis
chroot_local_user=YES
dirlist_enable=YES
download_enable=YES
guest_username=genesis
10. Instead of saving it to template1forusers, Write out the filename to genesis.
11. Restart Vsftpd. sudo /etc/init.d/vsftpd restart
12. Try logging in with
user name: genesis
password: genesispasswordgoeshere
Give yourself a pat on the back. Great job!
.
May 17, 2009
Ubuntu Logon Screen: Security Warning Message
Use this message as a warning on your computers, servers, etc.
"This computer system is the private property of Company Name Goes Here, whether individual, corporate, or government. It is for authorized use only. Users (authorized or unauthorized) have no explicit or implicit expectation of privacy.
Any or all uses of this system and all files on this system may be intercepted, monitored, recorded, copied, audited, inspected, and disclosed to your employer, to authorized site, government, and law enforcement personnel, as well as authorized officials of government agencies, both domestic and foreign.
By using this system, the user consents to such interception, monitoring, recording, copying, auditing, inspection, and disclosure at the discretion of such personnel or officials. Unauthorized or improper use of this system may result in civil and criminal penalties and administrative or disciplinary action, as appropriate. By continuing to use this system you indicate your awareness of and consent to these terms and conditions of use. LOG OFF IMMEDIATELY if you do not agree to the conditions stated in this warning."
.
May 16, 2009
How to: Creating a Certificate and Key for Vsftpd FTPS
In this post, we will create a Vsftpd SSL Certificate and Key using 1024 bit encryption to turn our Vsftps FTP server into a Vsftpd FTPS server.
The advantages of creating our own certificate are: we can define our company name, organization, location, and technical support contact information. This means when new users connect to our server, they will see our custom SSL Certificate with our company name and information, which will make our FTP look more formal/professional.
Overview of what we're about to do:
- Backup vsftpd.conf
- Edit our vsftpd.conf file and comment out the current certificate and key
- Insert the new location of our certificate and key
- Create our new certificate and key files
- Restart Vsftpd
- Put on our sunglasses and relax under the sun
The Guide:
1. Backup our vsftpd.conf file
sudo cp /etc/vsftpd.conf /etc/vsftpd.0905222. Edit vsftpd.conf
sudo nano /etc/vsftpd.conf3. Ensure that snakeoil rsa_cert_file and rsa_private_key_file are commented out. Insert the location of the new certicate and key.
#rsa_cert_file=/etc/ssl/certs/ssl-cert-snakeoil.pem
#rsa_private_key_file=/etc/ssl/private/ssl-cert-snakeoil.key
rsa_cert_file=/etc/vsftpd/vsftpd.pem
rsa_private_key_file=/etc/vsftpd/vsftpd.key
4. This will create a key that will expire after 365 days in which we will have to create a new key.
sudo openssl req -x509 -nodes -days 365 -newkey rsa:1024 \-keyout /etc/vsftpd/vsftpd.key \-out /etc/vsftpd/vsftpd.pem5. Restart Vsftpd
sudo /etc/init.d/vsftpd restartTest using your favorite FTPS enabled client
Good job, buddy!
.
May 15, 2009
Sample Vsftpd Configuration File
For those trying to create a Vsftpd FTP Server, just for reference, here's my Vsftpd configuration file configured for:
- PAM authentication for Virtual Users
- FTPS SSL
- No anonymous users
- Ports 30000-30100 for firewall access when using Passive connection
- Chrooted users
#Sample Vsftpd Config:
write_enable=YES
guest_enable=YES
user_config_dir=/etc/vsftpd/vusers
listen=YES
listen_port=990
local_umask=022
anon_umask=022
anonymous_enable=NO
local_enable=YES
anon_upload_enable=NO
anon_mkdir_write_enable=NO
dirmessage_enable=YES
xferlog_enable=YES
connect_from_port_20=YES
idle_session_timeout=600
data_connection_timeout=120
ftpd_banner=**********Something goes here.************
chroot_local_user=YES
secure_chroot_dir=/var/run/vsftpd
pam_service_name=vsftpd
pasv_min_port=30000
pasv_max_port=30100
ssl_enable=YES
allow_anon_ssl=NO
force_local_data_ssl=YES
force_local_logins_ssl=YES
ssl_tlsv1=YES
ssl_sslv2=YES
ssl_sslv3=YES
rsa_cert_file=/etc/vsftpd/vsftpd.pem
rsa_private_key_file=/etc/vsftpd/vsftpd.key
hide_ids=YES
max_per_ip=2
max_clients=15
May 14, 2009
Vsftpd FTPS and FireFTP don't mix
When I was using FireFTP on a FTPS enabled Vsftpd server, my login was okay, but the connection was stuck at Directory Listing. Downloading files and uploading files were okay, just the directory listing was extrutiatingly slow for me--it took up to 2 minutes to load the directory listing. I tested using Filezilla, and it worked superbly, so I'll just post this out there in case others are running into the same problem.
.
May 13, 2009
How to: Webmin Installation Guide
This post is an excerpt from the guide posted on Ubuntugeek.com
sudo aptitude install perl libnet-ssleay-perl openssl libauthen-pam-perl libpam-runtime libio-pty-perl libmd5-perl
Now download the latest webmin using the following command or from here:
http://www.webmin.com/download.html
wget http://garr.dl.sourceforge.net/sourceforge/webadmin/webmin_1.4XX_all.deb
Now we have webmin_1.4XX_all.deb package install this package using the following command
sudo dpkg -i webmin_1.4XX_all.deb
This will complete the installation.
Ubuntu in particular don’t allow logins by the root user by default. However, the user created at system installation time can use sudo to switch to root. Webmin will allow any user who has this sudo capability to login with full root privileges.
Now you need to open your web browser and enter the following
https://your-server-ip:10000/
If you cannot connect, make sure to add port 10000 to your firewall.
Subscribe to:
Posts (Atom)